Adding Memberships #
Initial Setup #
Memberships are an add-on module available through the Insight sales department. The module allows for creation of client memberships that have special benefits assigned to them such as:
-
- Discounted products and/or services
- Accumulation of service/product ‘credit’ to be used later
- A certain number of free ‘bonus’ services
NOTE: The membership feature is not designed to work with tanning services that use tanning beds and need minutes tracked. Memberships can only be configured for regular services added under Services → Services in Insight.
Memberships Screen #
Open Insight and click on ‘Services’ → ‘Memberships’.
Here you can click ‘Add Membership’ to get started creating a membership.
Membership Details Tab #
- Set specific days for the membership to apply.
- Choose if the membership has a duration.
- Set if this membership can be shared between more than one person.
Billing Details Tab #
NOTE: This tab is only applicable if you have credit card integration and the capability to store/charge credit cards through Insight.
- Choose if the billing will be one-time or recurring.
- Set the initial price. This will be the price they are charged on the day they purchase the membership.
- Set the payment amount. This will be how much they are automatically billed each billing.
- Choose how often to bill the client.
- Choose when the billing ends.
Benefit Details Tab #
Choose what benefits members will receive here. You can choose:
- Service or product % off discount.
- Number of free services or products.
- A balance of service and/or product credit.
- Bonus free services.
On the Renewal Options tab, you can choose if the benefits will:
Refresh: Amount of free items/item credits/bonus services will reset back to the initial amount every billing.
Carry over: Amount of free items/item credits/bonus services will reset back to the initial amount every billing and any leftover amounts from the previous month will be added to the reset initial amount.
Never update: Amount of free items/item credits/bonus services are available until used up. Their amount will not change upon billing.
Commission Details Tab #
If your employees make commission on selling this membership, set the percentage or amount here.
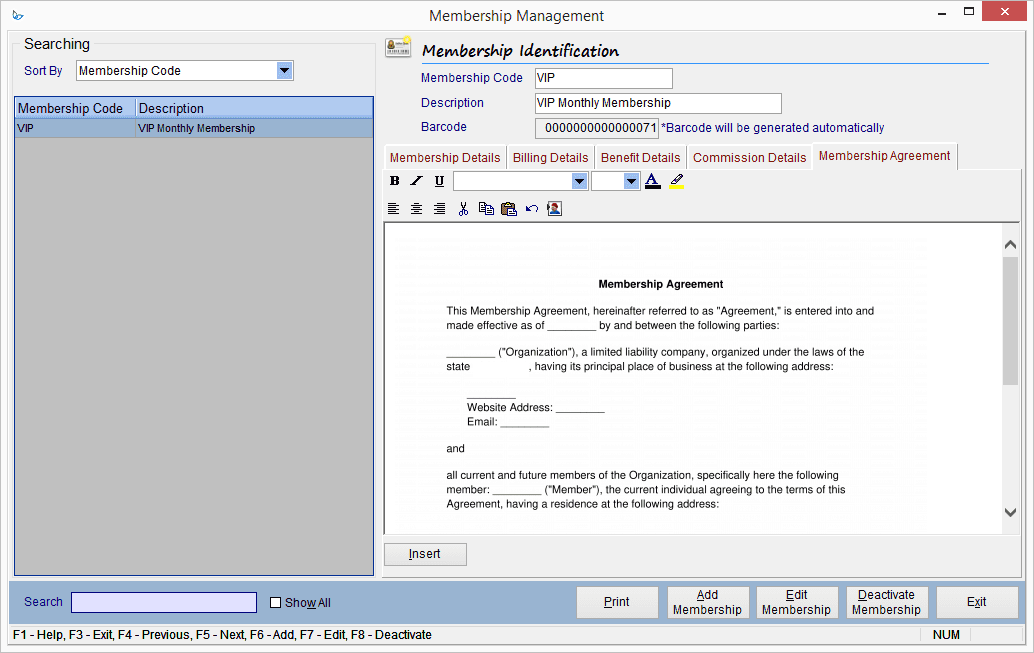
Membership Agreement Tab #
Optionally, add your membership agreement here. You can then print it from this screen:
Selling and Tracking Memberships #
Open the Sales screen. Follow the video instructions to sell a membership and set up billing:
Recurring Billing #
NOTE: You must have credit card integration in order to bill recurring payments through Insight. To check, go to the Setup menu and look for Credit Card Integration. If it is greyed out, you do not have this feature. Speak to the sales department if you would like to learn more.
When you sell a membership in the Sales screen, Insight will prompt you to set up a recurring billing for that membership automatically. You also have the option to add a standalone recurring billing that is not linked to a membership. Please note that Insight does not have the capability to prorate automatically and any prorating must be done manually.
NOTE: Although recurring billings are set to bill the client on a certain day of the month, you have to run the billing utility on that day for the clients to be billed. See Section 3.2 for details.
Adding a standalone recurring billing #
Please note that these instructions are for a recurring billing that is not linked to a membership. This is the method you will use for tanning package memberships. To learn how to sell a membership with a recurring billing, see Section 2.
- Go to the Clients screen.
- Choose the client you’d like to add a billing for.
- Click on the Rec. Payments tab (top-right).
- Click Add Billing (bottom-right).
You will see this screen pop-up:
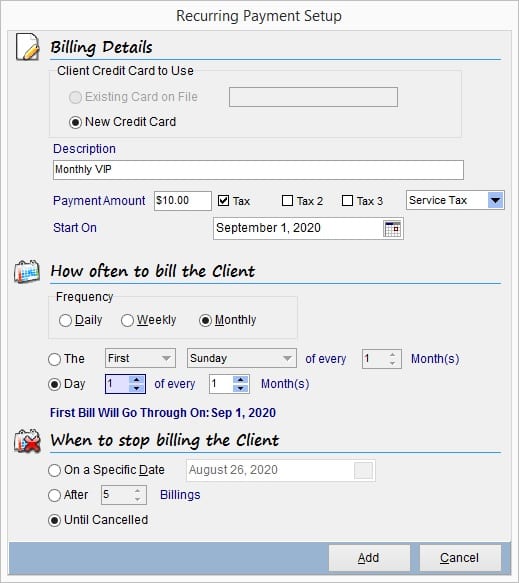
- Choose an existing card on file or select Add New (it will prompt you to store their card after you click ‘Add’ at the bottom).
- Choose a description for the charge.
- Set the payment amount and what taxes will be applied.
- Choose the date that the billing will start.
- Choose the billing frequency and the day that they will be billed.
- Choose when the billing will end.
- Click Add when finished to save the billing.
Running Recurring Billing #
Insight does not bill clients automatically on their billing date. The reason for this is so that if a billing is declined, you will be aware and able to contact the client to rectify the issue in order to bill them successfully. Insight will automatically generate the list of clients who need to be billed. Follow these steps to run your billings:
- Go to Utilities → Management → Bill Recurring Payments.
- Insight will load the payments that are due on today’s date as well as any past payments that are still outstanding.
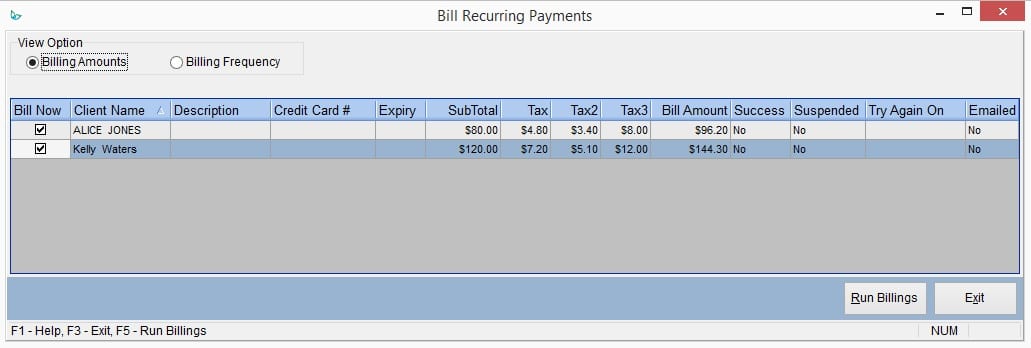
- Click Run Billings to charge the people in the list. You will see the outcome under the Success column.
- If you have any unsuccessful billings, Insight will show a date under the Try Again On column. This is when the client will pop back up in this screen to attempt the billing again.
- If you’d like to try the declined billing again right away, you can go to: Clients → Select client name → Rec. Payments → Actions → Pay Now.
Membership & Billing Reporting #
Use the following reports to track memberships and billings: